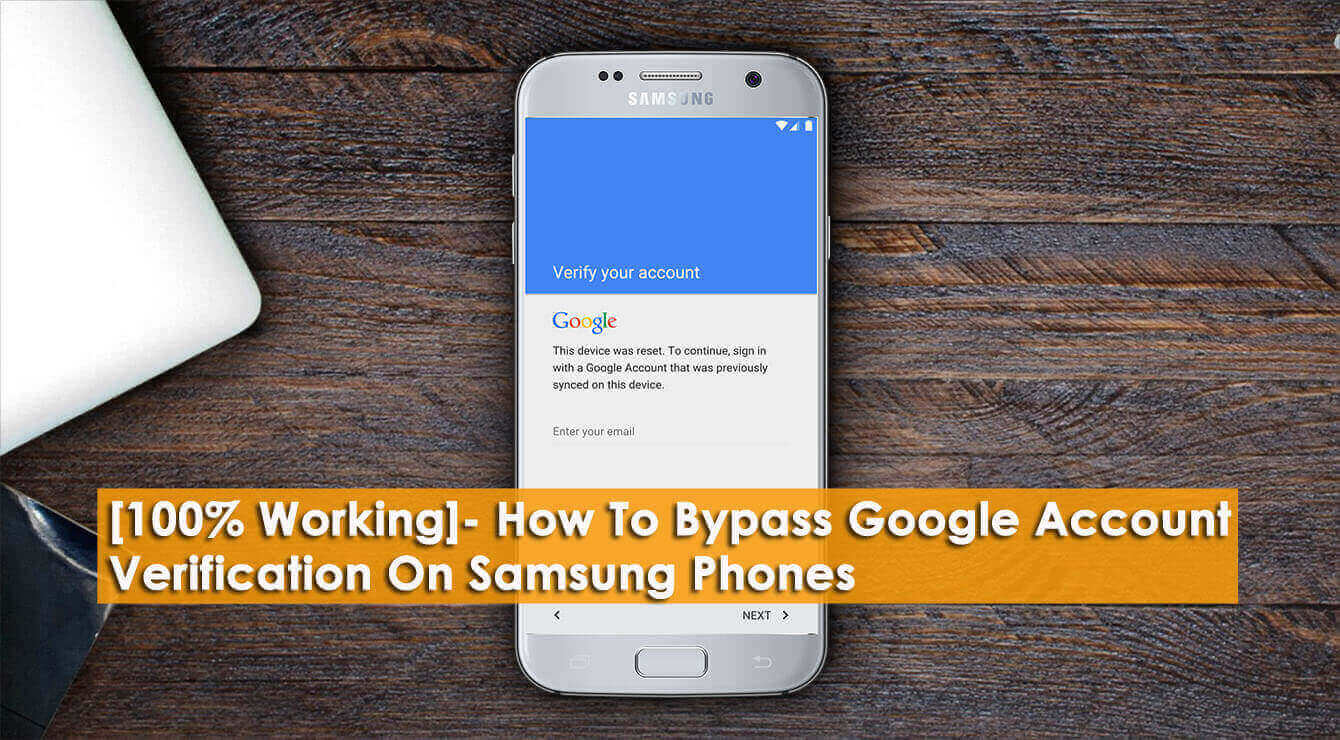
Did you come across “this device was reset. to continue sign in with a google account“? Are you looking at how to fix this device was reset to continue in an easy way?
Everyone is familiar with Google and every day Google is making some changes so that users’ data can be safe and secure. In fact, Google’s first priority is to secure the user’s stuff in a safe way. Due to this reason, when the Android Lollipop version was launched Google placed a security feature making the phone unusable when it gets lost or stolen.
In this way, all the data or contents stored on the phone will be safe and secure. But there are chances of getting in trouble even going through this process when users forget their passwords to Google accounts.
So if users aren’t able to retrieve the password of their Google account then the device becomes useless. To tackle the situation, you need to know how to bypass Google’s security verification after reset when it comes to doing a factory reset of the device.
So, this blog completely describes how to fix This Device Was Reset. To Continue Sign In With A Google Account on Samsung or how to bypass Google account verification on Samsung phone.
So let’s read further.
What is FRP or Google Account Verification?
FRP is Factory Reset Protection or you can also know it better as Google Account Verification. It’s a new feature developed by Google when Android Lollipop 5.1 was released. It brings a built-in security layer to all Android devices.
When your Android or Samsung phone gets stolen or lost then anyone can factory reset it to unlock the phone and use it for their own purpose.
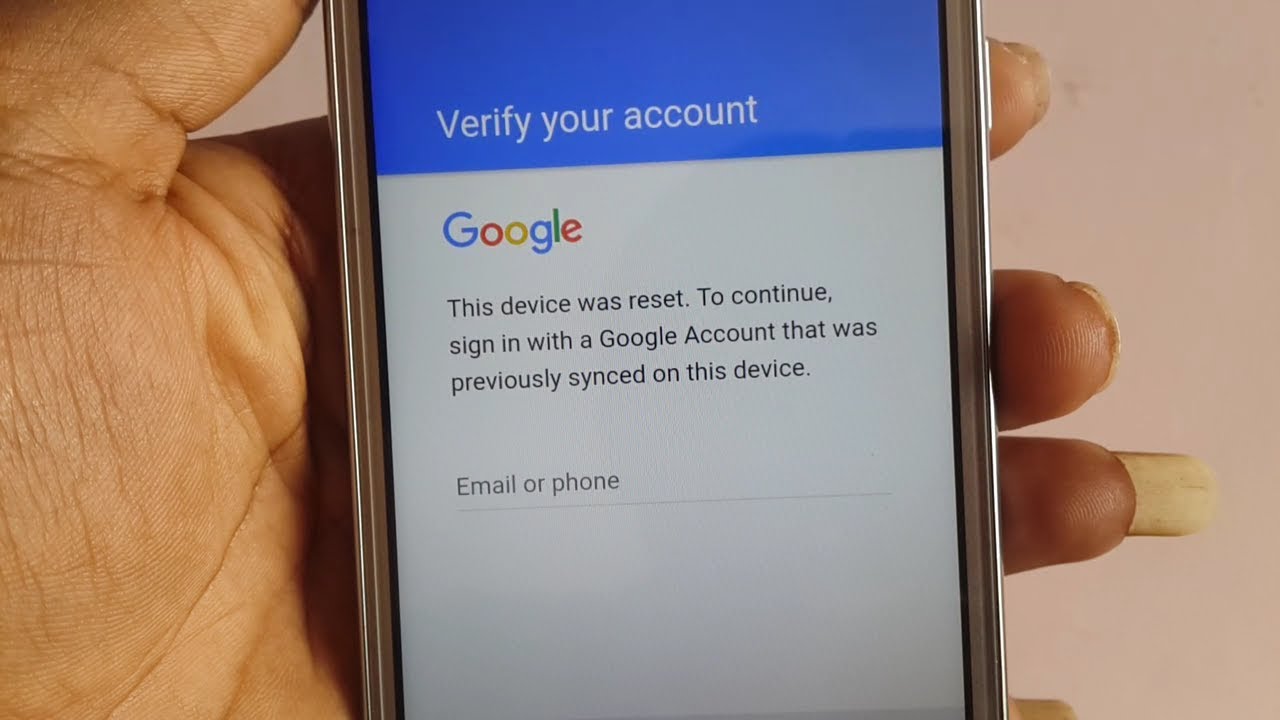
But now, everything has changed and all thanks to FRP as it will show a message “This device was reset. To continue, sign in with a Google account that was previously synced on this device“. It means that the device is useless until Google account verification is passed.
All in whole, you can say that FRP is developed to ensure that no third person can wipe your stored data from your phone and do a factory reset easily when it gets lost or stolen. This is one step towards protecting our device from access by any other person.
But this process is also a big headache when we as a user forget FRP. So, you should know how to remove Google account verification on Samsung phones. It’s easy to disable FRP when you have an idea about how to do this.
How to enable and disable FRP on an Android phone
You should know that FRP gets enabled automatically when a Google account is added to your device. If you want to add a Google account then follow the below steps:
- First, go to Settings > Accounts > Add and Account> Google. After that, enter the username and password of your account to add

Now to disable FRP, you need to remove the Google account.
- First, go to Settings > Accounts > Google and then select the Google account you have added and search “Remove account” by simply tapping the icon
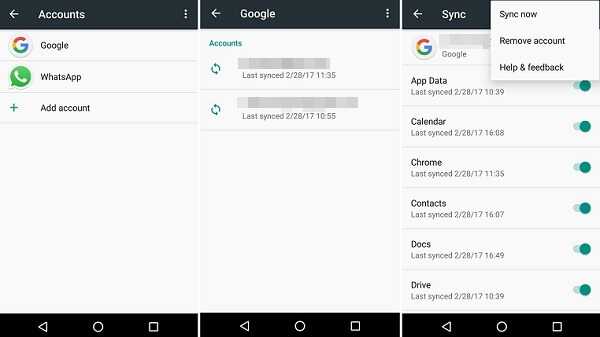
So here, if you are giving your phone to any other person or selling it then you should remove your Google account from your phone to disable FRP. After that, erase your data from your phone and your device will be ready for use by any other person without FRP.
Important Tip–
To evade from FRP issue, you should stop doing a factory reset on your phone for 24 hours after the Google password is changed recently. Because of some security reasons, Android will stop you from setting up your phone with a Google password that is recently reset in 24 hours.
How to bypass Google account verification for Samsung phones
Everyone is familiar with Samsung phones but the issue also occurs to every user especially those users who are using secondhand phones. So, if you want to know how to bypass Google verification on Samsung then go through the below methods.
Method 1: Bypass FRP on Samsung using OEM Unlocking
First, you have to factory reset your phone and then wait unless the device reboots and says to select a language.
Now proceed further:
- Connect your device to a Wi-Fi network after which you will see an asking for a Google account
- Click on the Text field in which the account will be inserted unless the Keyboard comes up
- Now click and hold the “@” character unless the Settings menu appears
- Here you have to choose Google Keyboard Settings
- Then click on the 3 dots or More option depending on your Android OS
- After that, choose Help & Feedback and choose any of them from the list

- Now from the Help section, click on Using Google Keyboard
- Do a long press in any text to select and then tap on Websearch
- You will get a search field
- After that, type Settings in that search option
- Now move down unless you get the “About Phone” option and click on it

- Here you have to enter the menu and search for Build Number. Click 7 times on that Build Number to enable Developer Options
- Now again return back to the previous menu and open the Developer Option
- Here you have to allow OEM Unlocking and then press Back two times
- And now you have to restart your phone
- Again connect your device to the WiFi
- Here you will not be asked to log in to your previous Google account but the phone will ask you to ADD a new Google Account
- Here you have to add a new account and your Samsung device will be ready to use now
- And that’s it.
Method 2: How to Bypass Google account verification after reset on Samsung using the Bypass Tool
FRP Bypass Tool is one of the known tools that helps to avoid the Google Account Verification step during the setup of the Samsung device. This tool can be easily downloaded and used to fix Samsung This device was reset. To continue… and can be accessed after doing a factory reset.

You need to follow the below steps for the FRP bypass tool:
- First, you have to download the FRP tool from the below link mentioned. After downloading it, copy it on a pen drive
- After that, you have to reboot your phone and choose your preferred language before pressing “Start/Next”

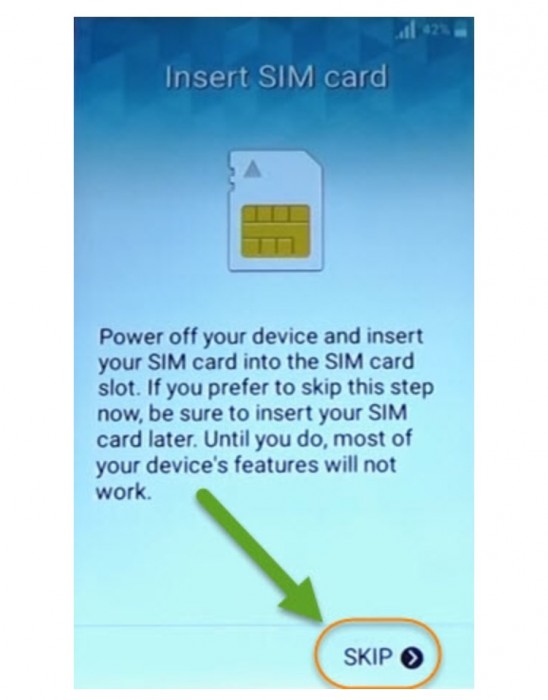
- You will get a popup to insert SIM. Just ‘Skip’ this step and move further
- Here you have to connect your device to Wi-Fi and click on “Next”

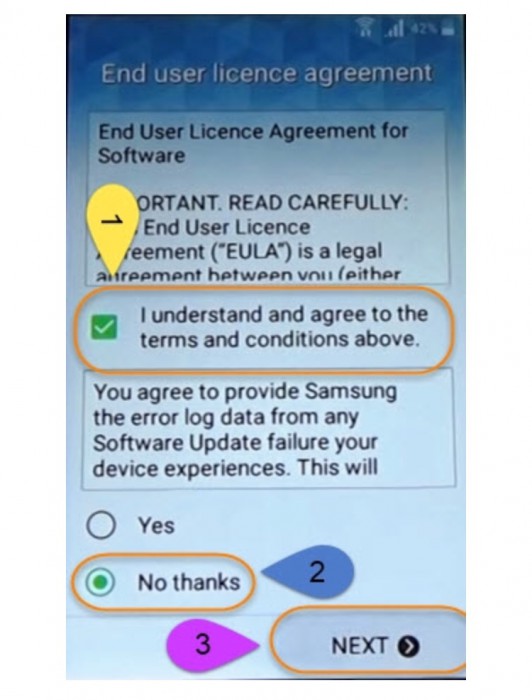
- Now on the next page, tick-mark on the option that says “I understand and agree….” And then click on “Next”
- Here you will get the Google Account Verification window
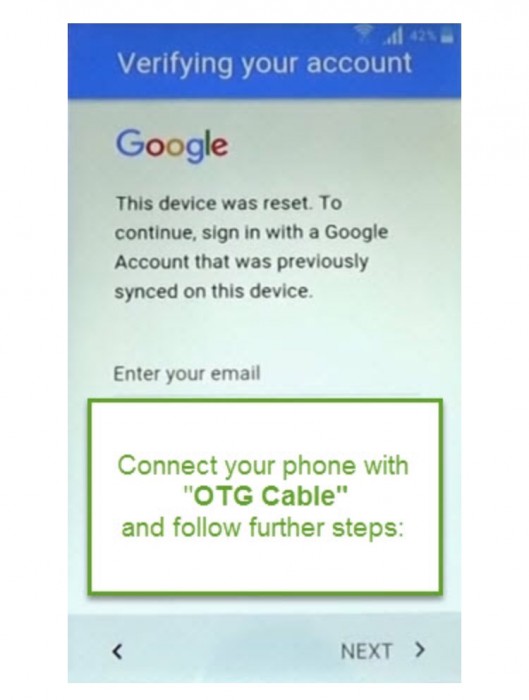
- Here using the On-The-Go cable, you have to connect your device and pen drive in which you have copied the FRP tool
- When File Manager occurs on the screen, check for the FRP Tool file with the .apk extension and then choose it
- Here you will see the “Development Settings” window, then choose “Install” and continue

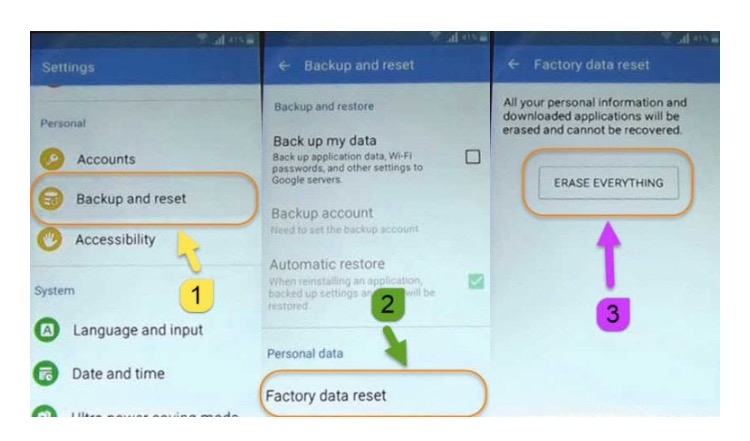
- Now you can “Open” the installed App file on the “Settings” page. Choose “Backup and reset” to “Factory data reset” on the device by clicking “Erase Everything” as given below.
Important–
Samsung phone will reboot and then it needs to set up again but it will not ask for Google Account Verification this time.
Method 3: Download FRP Bypass APK to remove Google account verification
Even you can use FRP Bypass APK to remove account verification. You will get many tools developed to bypass Google accounts for Samsung, Nexus, Huawei, LG, Alcatel, and others.
Now follow the below steps to remove the Google account lock:
- First, select a suitable FRP bypass App like Pangu FRP Bypass APK, FRP Bypass APK, etc. You have to check these .apks as some are not free
- Now download the tool on a USB drive
- After that, connect the USB drive to the phone through an OTG cable. Now install the APK file and after installing the app, you access phone settings and delete everything including your Google account.
Method 4: Factory Reset The Phone
When you still look for how to bypass previously synced Google account then it’s better to reset the device once. This will help you to bypass the sign-in lock when you forget the password.
Here are the steps to follow:
- For Samsung phone users, press and hold the Power + Volume Up + Home button together
- Continue to hold unless a booting popup occurs on the screen
- Now, choose “Wipe Data/Factory Reset” and move ahead
- After that, choose the “Yes – Delete all user data” option
- At last, click on Reboot System Now via the Power button
Method 5: Advance Solution To Bypass Lock Screen On Samsung/Android (Highly Suggested)
Apart from the manual methods, you can also go for automatic methods to get rid of the issue. There are several of them that can easily unlock your devices without a password and that is Android Unlock Tool. This is professional software that allows users to remove the Android/Samsung lock screen with one click without data loss.
Using this tool, users can easily bypass any type of lock screen like PIN, Password, Facelock, Fingerprint, Patterns, etc. This is easy to use and helps to fix this device was reset to continue sign in with a Google account. Therefore, you should download and use this tool without any problem.
FAQ:
Does flashing a phone will remove FRP?
No, it does not. When you allow OEM unlock feature to flash the phone and after that do a factory reset then you have to still log in with your Google account to activate it.
Does Factory Reset Remove Google Account?
No, Factory reset does not remove your Google account. But it can delete all data stored on your device and make it as a new one. However, some data can still be restored using a professional tool.
Can I delete previously synced Google Account after reset Android?
No, it is not possible. After you launch FRP on your Android phone, resetting will not help to remove the synced Google account. You will be asked to enter the password of synced Google account by FRP feature to complete the reset process.
Conclusion
So, all these are some of the methods to bypass This Device Was Reset. To Continue Sign In With A Google Account on Samsung/Android. I hope that these methods will help you to remove Google account from Android phone after factory reset.
If you have any questions or queries then kindly mention them in the below comment section.
You can further reach us through our social sites like Facebook and Twitter

Sophia Louis is a professional blogger and SEO expert from last 11 years. Loves to write blogs & articles related to Android & iOS Phones. She is the founder of Android-iOS-data-recovery and always looks forward to solve issues related to Android & iOS devices
