Part 1: Recover Lost Data From Android Phone
Part 2: Recover Deleted Data from Android SD card
Part 3: Recover Lost Data From Broken Android Phone
Step 1: Connect Your Android Phone
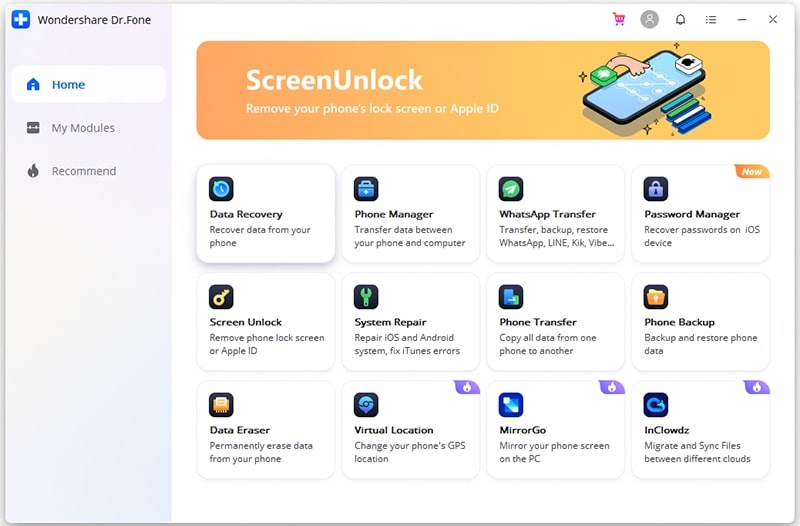
First Download Android Data Recovery software and then select “Recover Lost Data”

Now connect your android device to the PC via USB cable.

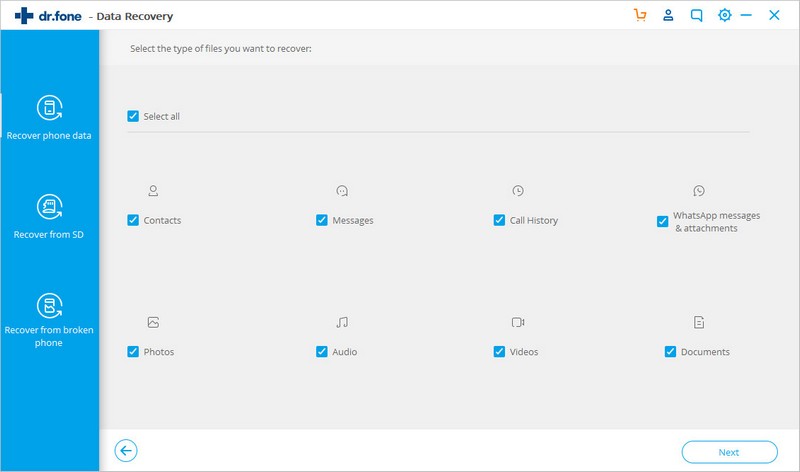
Step 2: Select the file types to scan
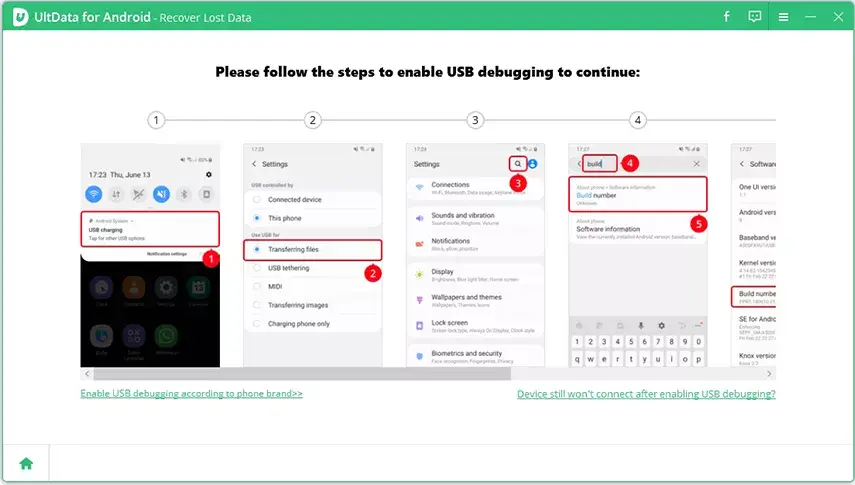
Now, ensure you have enabled USB debugging on phone. Just open Settings > Turn USB option to “Transfer Files” > Go to Settings > search “Build” > move down to find the Build Number and click on it 7 times.
Note- You will get two buttons at the bottom. Click on it when you fail to enable USB debugging or connect your phone. After that, follow the on-screen instructions.

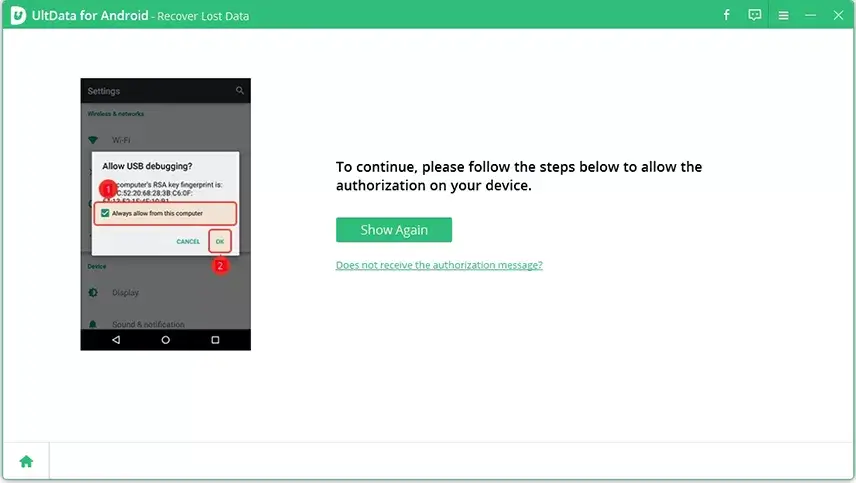
Once you enable USB debugging, you have to allow authorization. Simply tap on “OK” when windows popup. If you don’t get any windows then click on the “Show Again” option.
Step 3: Begin scanning the device
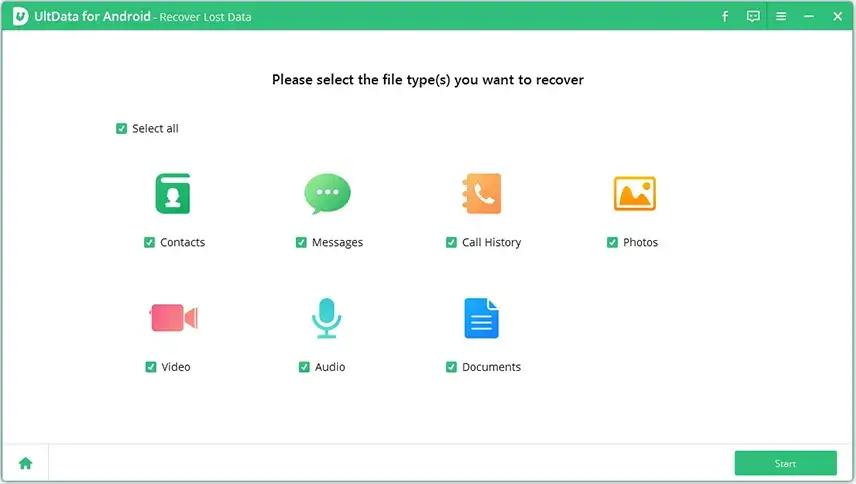
After your phone is connected, you will see the screen as given below. From here, choose the file types that you wish to restore and then tap on “Start” to scan the files.
Now, the software will begin to collect data from the device and then install the Connector app on phone to ask access permission for the data like contacts, messages, etc. After your install, the app, tap on the “Allow” option.

Step 4: Preview and recover deleted data from Android
Once the scanning is finished, all files will be viewable from where you have to choose any files to preview and restore.
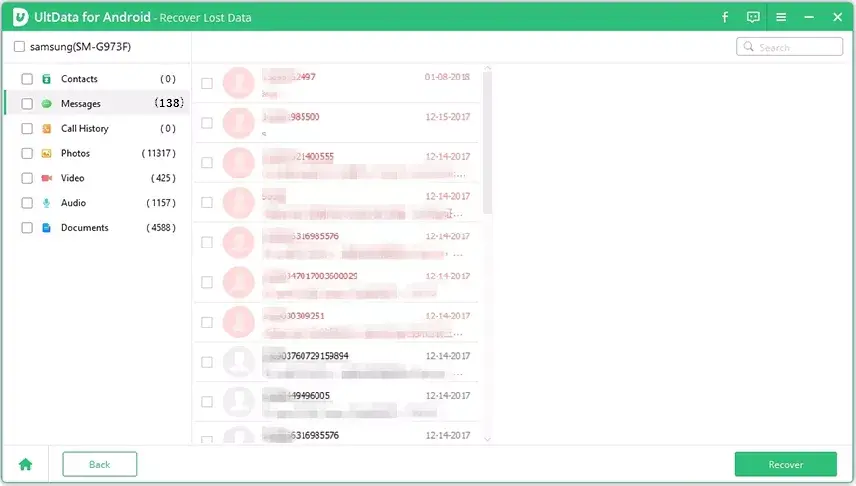
Now, tick mark on the file that you wish to restore. Tap on the “Recover” option to save deleted files on the PC. Remember, photos, video, and document files will be saved in original format. Whereas for contacts, SMS and call records will be saved in.TXT, .XML, XLS format.

Part 2: Recover data from SD card
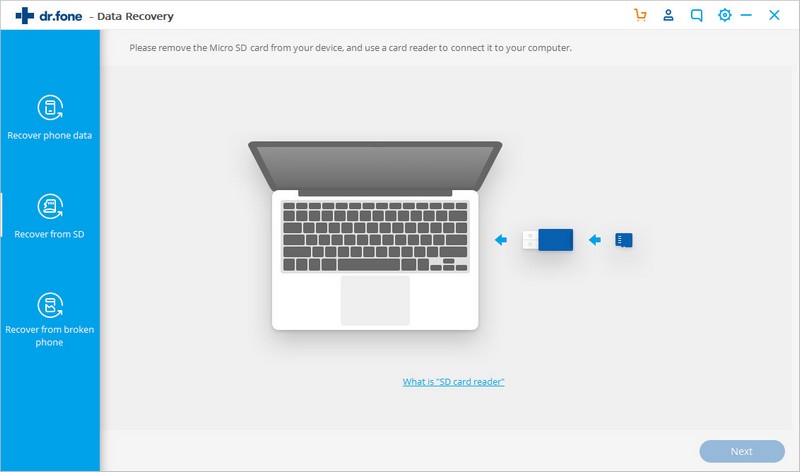
Step 1: Connect your micro SD card via Android device or card reader
First, launch Android Data Recovery on the computer and choose “Data Recovery”
Now connect SD card to PC. You will get two ways to connect your SD card: using a card reader or using an Android device. Select the better way and then tap on “Next”
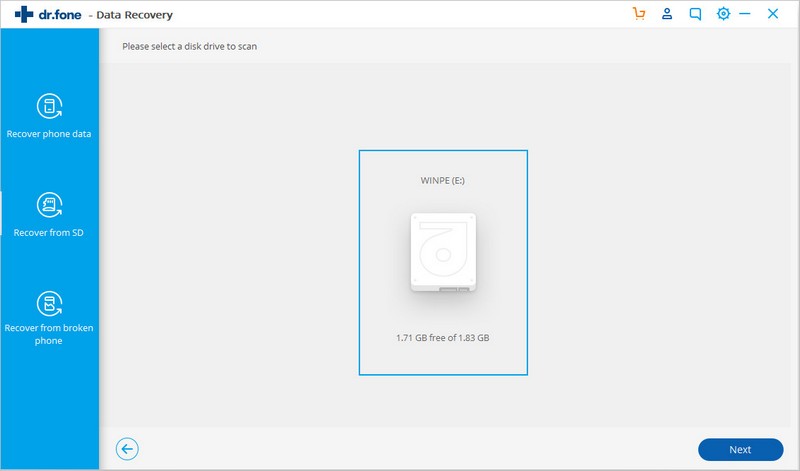
After your SD card is detected, the below window will appear. Just tap on “Next” to proceed
Step 2: Now select scan mode to scan the SD card
You will get two scan modes to recover data from the SD cards. You should try the Standard Mode first. When it does not work then try Advance Mode. Standard Mode allows you to select scan only for the deleted files or scan for all files on the SD card.

Now choose the Recovery mode you wish and tap on “Next” to start scanning the SD card

Step 3: Preview and recover data from SD card selectively
Once the scanning process is finished, the found files will be displayed in categories. From the left sidebar, click on different data types to display results. Then selectively check and un-check files and tap on “Data Recovery” to begin the data recovery process.

Part 3: Recover lost data from broken Android phone
Step 1: Connect your Android phone to computer
First, launch Android Data Recovery on the computer and choose “Data Recovery”
Then connect your Android phone to PC via USB cable. Now choose “Recover Data from Android”

Step 2: Select data types you want to recover from a broken phone
By default, Android Data Recovery selects all data. Choose data types that you only want and then tap on the “Next” option
Remember that this function only extract existing data on broken Android phone
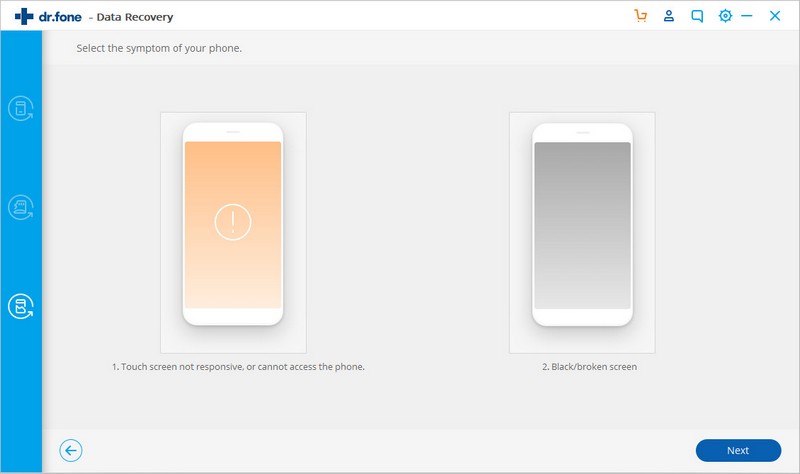
Step 3: Select a fault type that matches your situation
Two types of faults on Android phones, Touch does not work or cannot access the phone and Black/broken screen. Tap on anyone and then you will go to the next step
Now on the new window, select the correct device name and model for the phone. Remember this function only works on Samsung phones like Galaxy S, Galaxy Note, and Galaxy Tab series. Now tap on “Next”
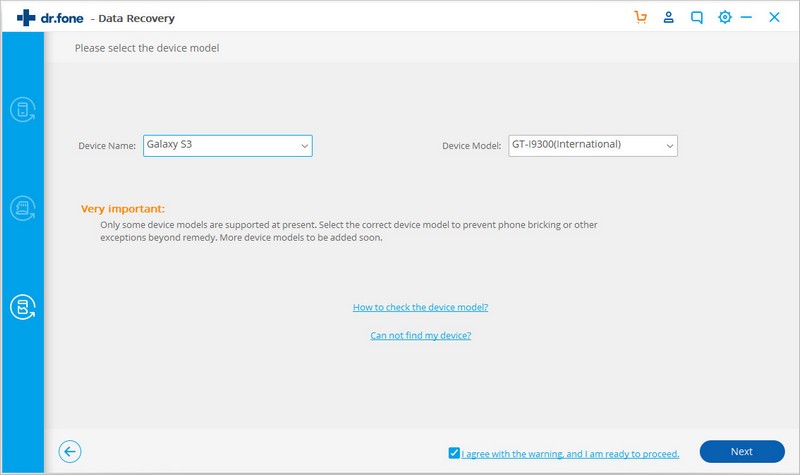
Ensure you have chosen the correct phone name with the device model. Wrong information may lead to bricking phones or other errors. When information is correct, select “Confirm” and then tap on “Confirm” to continue.

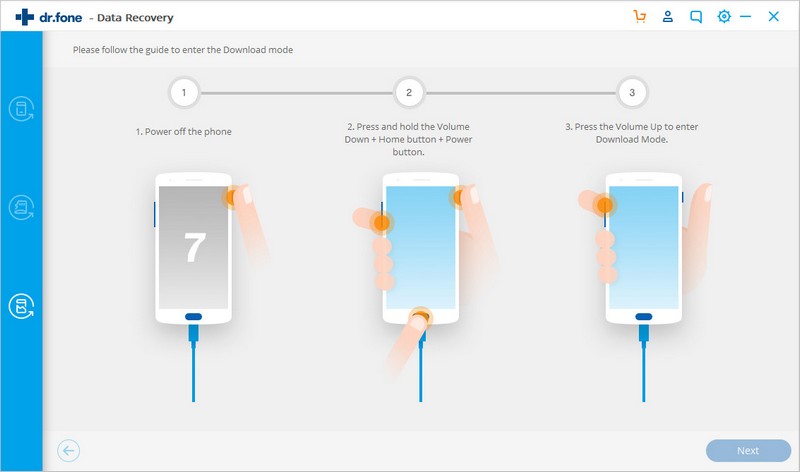
Step 4: Enter Download Mode on Android phone
Here you need to follow the instructions on the program to get Android phones in Download Mode.
- First, switch off the phone
- Then press and hold the Volume “-“, “Home” and “Power” button
- Now again press “Volume +” to enter download mode
Step 5: Analyze the Android phone
Once the phone is set to Download mode, the software will begin to analyze your phone and download the recovery package
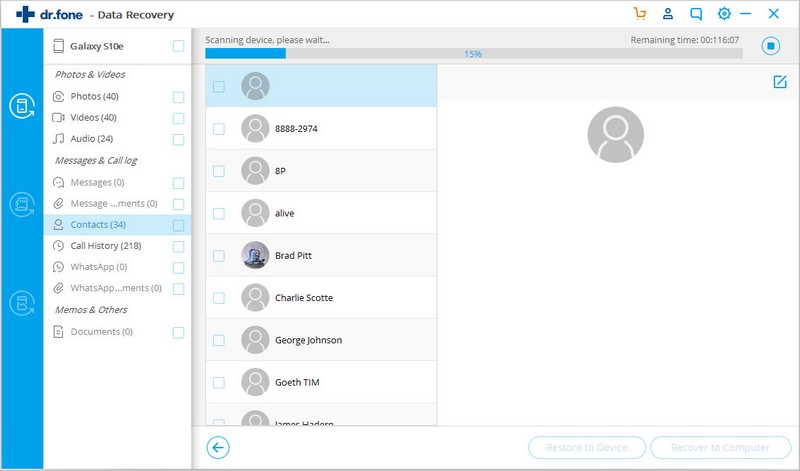
Step 6: Preview and recover data from broken Android phone
When the scanning process is over, the Android data recovery tool will display all file types by categories. Now you will easily choose files to preview. Select the files you need and click on “Recover” to save all the important files you want.
